
Motivation
Sphinx is a tool that helps you create intelligent and beautiful documentation. I use it to generate documentation for the pytorch-lightning-spells project and publish it on readthedocs.io for free (if the project is open-source).
Documentation is tremendously helpful to users of your project (including yourselves). As long as you maintain the good habit of writing docstrings in your code, Sphinx will convert the docstrings into webpages for you, drastically reducing the manual labor required from you.
However, the learning curve of Sphinx is very steep. And since you don’t start a new project every day, you tend to forget the details on how to configure Sphinx from scratch when you need to (at least, I did forget). That’s why I wrote this post to provide a rough guide on how to set up Sphinx for your project. I’ll be using pytorch-lightning-spells as the example in this post.
Step 1: Add Sphinx to your Project
Remember to install Sphinx(pip install sphinx) first. Bootstrap Sphinx in your project by using the sphix-quickstart command (I prefer to store the Sphinx files in the docs folder):
mkdir docs
cd docs
sphinx-quickstart
Answer yes to “Separate source and build directories.” It makes the file structure a bit cleaner.
Theme and Extensions
Now you need to modify conf.py. The search path needs to be changed because we’re in the /docs/source folder, but usually, the package is just under the project root or in the /src folder:
import os
import sys
sys.path.insert(0, os.path.abspath('../..')) # or "../../src
Tell Sphinx which extensions to use:
extensions = [
    "sphinx.ext.autodoc",  # automatically generate documentation for modules
    "sphinx.ext.napoleon",  # to read Google-style or Numpy-style docstrings
    "sphinx.ext.viewcode",  # to allow vieing the source code in the web page
    "autodocsumm",  # to generate tables of functions, attributes, methods, etc.
]
You’ll need to install autodocsumm via pip (pip install autodocsumm).
I recommend using the theme sphinx-rtd-theme from Read The Docs (install via pip install sphinx-rtd-theme):
html_theme = 'sphinx_rtd_theme'
Finally, these are some autodoc flags I set:
# don't include docstrings from the parent class
autodoc_inherit_docstrings = False
# Show types only in descriptions, not in signatures
autodoc_typehints = "description"
Step 2: Write the Documentation
At this point, you only have an index.rst file in the source folder. You’ll need to modify that file and create more rst files. There are tools like apidoc and autosummary to create rst files for you. Still, I’ve found that the results are not ideal under the default settings, and manually create rst files may be faster if you have a relatively small number of modules in your package.
Table of Contents
The toctree directive is mainly to let Sphinx be aware of the document hierarchy (the sidebar will reflect this understanding):
.. toctree::
   :maxdepth: 3
   :caption: Contents:

   index
   pytorch_lightning_spells
I self-reference the index page so the headings will show up in the sidebar. If you don’t need that, the content directive is for you:
.. contents:: Modules
    :local:
    :depth: 2
Autodoc the Modules
You need to specify modules for the autodoc extension to generate documentation. You can create an rst file for each module or group all the modules in a subpackage in an rst file.
The following are the contents of the file pytorch_lightning_spells.rst:
pytorch\_lightning\_spells package
==================================

.. automodule:: pytorch_lightning_spells
   :autosummary:
   :autosummary-no-nesting:
   :members:
   :undoc-members:
   :show-inheritance:

Submodules
----------

.. toctree::
   :maxdepth: 4

   pytorch_lightning_spells.callbacks
   pytorch_lightning_spells.cutmix_utils
   pytorch_lightning_spells.loggers
   pytorch_lightning_spells.losses
   pytorch_lightning_spells.lr_schedulers
   pytorch_lightning_spells.metrics
   pytorch_lightning_spells.optimizers
   pytorch_lightning_spells.samplers
   pytorch_lightning_spells.snapmix_utils
   pytorch_lightning_spells.utils
The :autosummary: and :autosummary-no-nesting: flag is from the autodocsumm extension.
Elaboration
Now you have all the modules, classes, and functions in the documentation. It may be a good idea to add some text to direct the readers to the more relevant parts. Sphinx uses reStructuredText, which is a lot more complicated than Markdown and might take some time to learn.
You be able to add an info box to a page:
.. warning:: The following three callbacks require `MixupSoftmaxLoss <pytorch_lightning_spells.losses.html#pytorch_lightning_spells.losses.MixupSoftmaxLoss>`_ to be used. The target 1-D tensor will be converted to a 2-D one after the callback. The MixupSoftmaxLoss will calculate the correct cross-entropy loss from the 2-D tensor.
And a link to a specific class on the other page:
* `MixUpCallback <pytorch_lightning_spells.callbacks.html#pytorch_lightning_spells.callbacks.MixUpCallback>`_
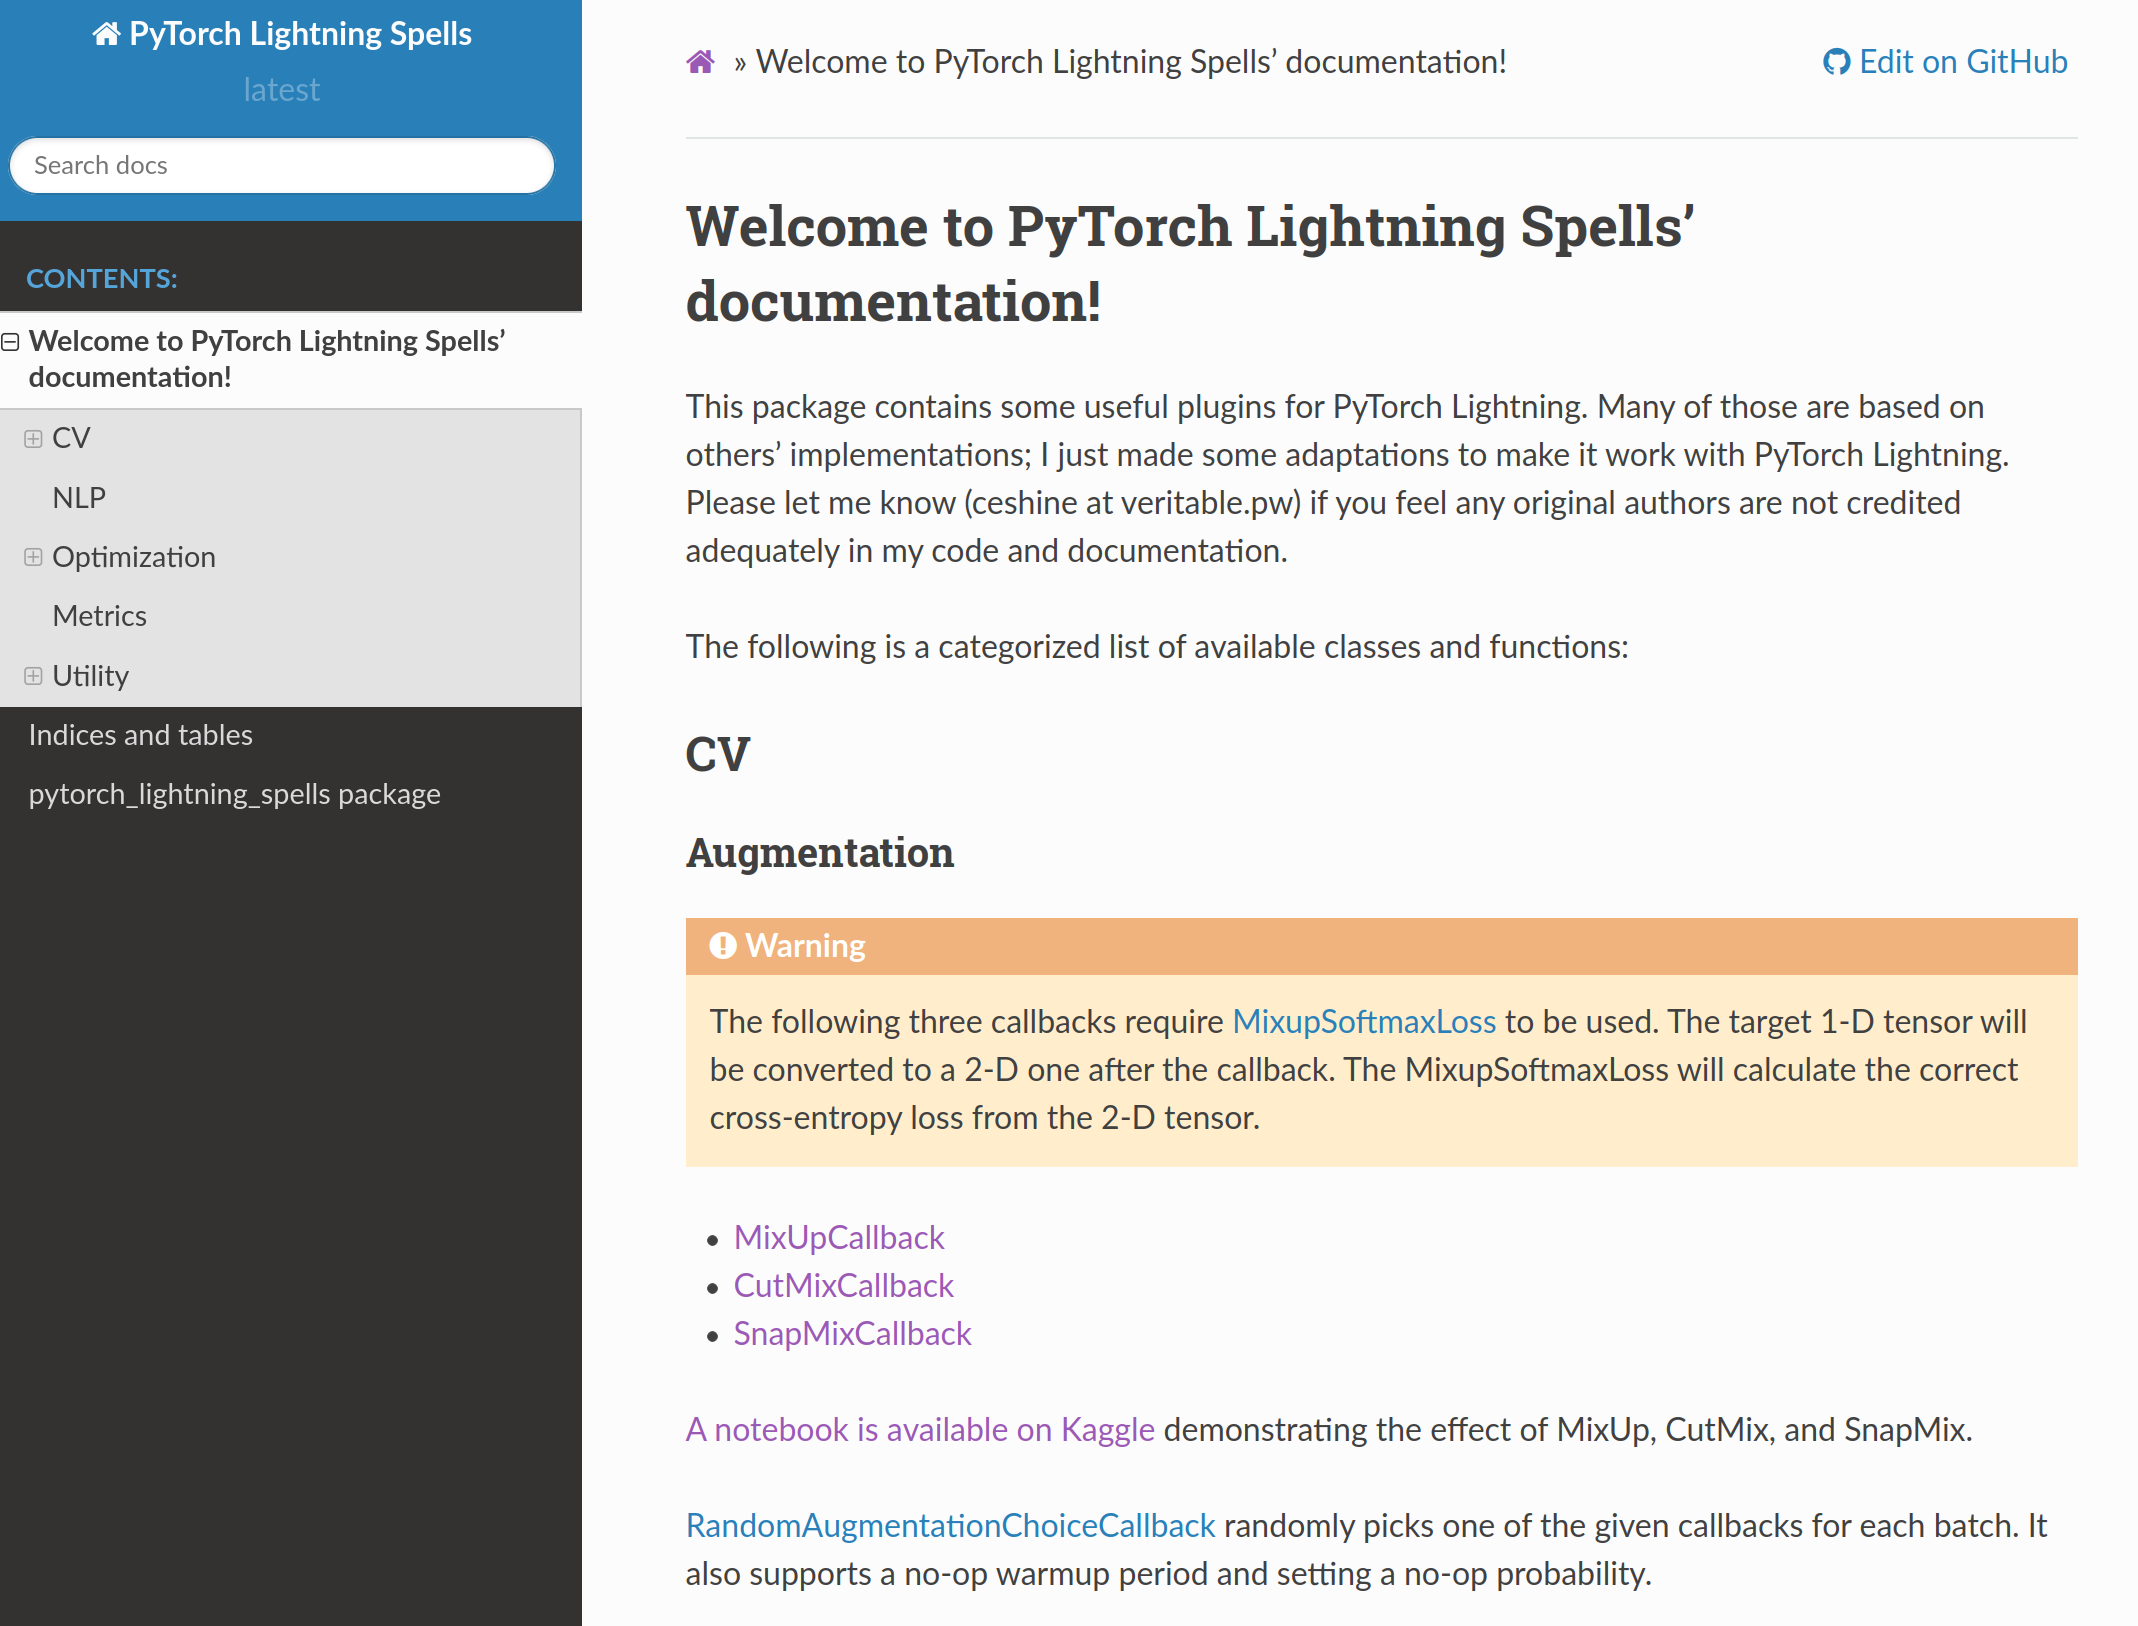
The index page written in reStructuredText
Step 3: Build and Publish
To build the HTML pages, simply run make html in the docs folder. You can then open the results in the browser (I’m using Firefox):
firefox build/html/index.html
To automatically publish the documentation on the Internet, sign up for a Read The Docs account and add a readthedocs.yml under your project root:
# Read the Docs configuration file
# See https://docs.readthedocs.io/en/stable/config-file/v2.html for details

# Required
version: 2

# Build documentation in the docs/ directory with Sphinx
sphinx:
  configuration: docs/source/conf.py

# Optionally build your docs in additional formats such as PDF
formats:
  - pdf

# Optionally set the version of Python and requirements required to build your docs
python:
  version: 3.7
  install:
    - method: pip
      path: .
  install:
    - requirements: docs/requirements.txt
    - method: pip
      path: .
This part should be relatively straightforward. Please refer to the documentation if in doubt.
Fin
That’s it! Thanks for reading! You have created and published a neat documentation website. There is much more power in Sphinx that we’re not using, of course, but for smaller projects, this post should suffice.
You can check out the docs folder in pytorch-lightning-spells, if any part of my post is not clear for you.